
This article is about How to Create a Minecraft Texture Pack. Minecraft Texture Packs are a great way to change the appearance of your reality, and they also allow you to place various things in the game. For example, say you wanted to make a square look like something different. You could change the cleaning square into an alternate sort of stone that is better for that particular square.
Reliably, Minecraft has remained steady with its textures. New updates may give two or three changes to textures, however generally, Minecraft maintains a classic and notable look.
How to make a custom asset pack in Minecraft?
Stage 1.) Open .minecraft organizer
The initial advance of making a texture pack in Minecraft is to open the Create a Minecraft Texture Pack library. On windows, open the start menu and type %appdata%. After this, hit enter and open the minecraft envelope.
Stage 2.) Extract texture pack documents
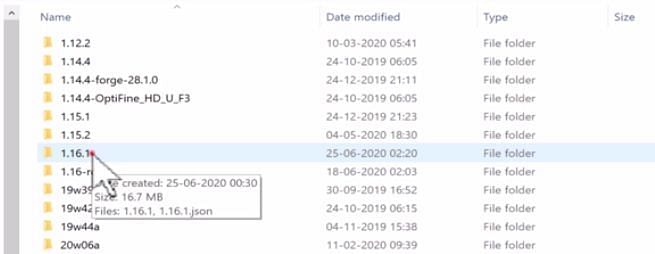
The ensuing stage is to open the .minecraft catalog, preceding opening the “versions” organizer. Inside this envelope, players should now open an organizer with the name of the Minecraft interpretation they want to alter the texture pack for.
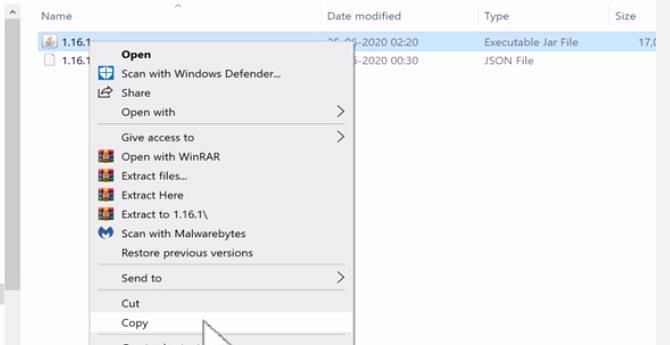
A jar report should be found inside this envelope, and players should right-click it and press “duplicate”.
Players should now create another envelope inside the main .minecraft list. This new organizer can be named anything. Inside this organizer, the duplicated jar record should then be pasted.
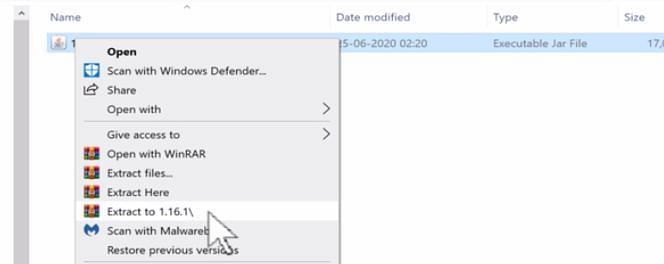
After this has been done, players need to right-tap the recently pasted jar record and press the decision named “extract to.”
Stage 3.) Open textures organizer
After everything has been extracted, players need to navigate to the textures organizer. This can be done by going to assets – > minecraft – > textures
Inside this textures envelope, players can pick express textures they should alter.
Stage 4.) Edit textures
Players can now alter any texture they may want just by right tapping the image record and opening the archive with any image altering software. Microsoft paint will do okay a significant part of the time, regardless.
After players are done altering the texture as wanted, they should make certain to save the updated changes made.
Stage 5) Create pack.mcmeta document
Navigate back inside the envelope with the base catalog of the as of late unfastened substance (the organizer with the variant number as it were). Another archive ought to be Create a Minecraft Texture Pack inside here.
This can be done by right-clicking inside catalog – > New – > Text Document
The accompanying ought to be created inside the new text archive:
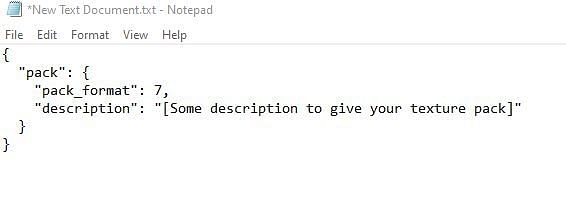
The pack_fomat number should be kept at 7 for variant 1.17, 6 for 1.16, 5 for 1.15 and so on.
Stage 6) Save pack.mcmeta document
By and by this record ought to be saved with the exact name “pack.mcmeta” and with the sort “All archives” in windows, as seen underneath:

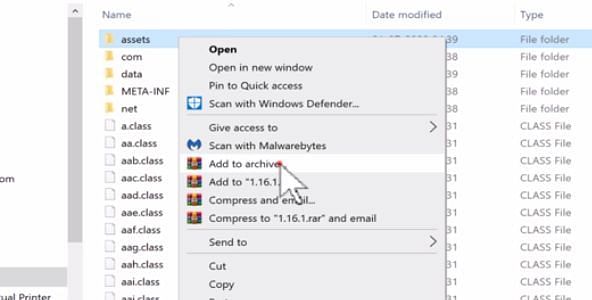
Stage 7) Compile the asset pack
Once the pack.mcmeta record has been adequately saved inside, it’s an ideal chance to arrange the final thing.
This can be done via holding the “ctrl” key and tapping the “assets” organizer and then, at that point. At that point (while as yet holding ctrl) tapping the mcmeta record. After this, players need to right-tap on either report and press “add to archive”. Using their zipping gadget (7 zip or winzip for example).
That’s it! If everything has been done adequately, players should have the choice to install. The as of late compacted record actually like any other texture pack out there. You can also read about How To Breed Pandas in Minecraft from here.