

Ruler’s Fall was an extremely famous Power the Glyph and Complete the Totems encounter in Kings Fall Raid in Destiny 2 and very much cherished strike back in the first Destiny, so it checked out for Bungie to bring it into Destiny 2 for players who never got an opportunity to do the attack when it originally returned out in 2015. While the Destiny 2 variant of King’s Fall might seem to be the first form with a new layer of paint and further developed lighting, it plays in an unexpected way, taking into account how different the two games are every way under the sun.
Following quite a while of stalling, the Destiny 2 local area at last got to play the well known King’s Fall Raid with their favored loadouts and weapons. Bungie has delivered past weapons and protection pieces from Destiny 1 back into the plunder pool in the repeated rendition of the Raid.
How to Power the Glyph and Complete the Totems Encounter in Kings Fall Raid in Destiny 2
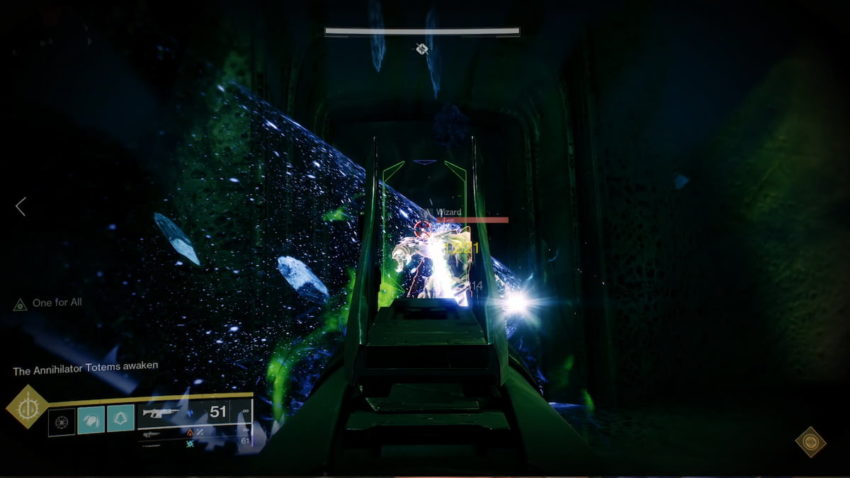
- At the point when you enter the region, there will be various acolytes revering before an entryway in a field with two indistinguishable sides. Your group should separate into gatherings of three, with two individuals from those gatherings taking the stages sitting above the acolytes, and one individual down the corridor, remaining on a Totem. There will be a brand on the Totems the individual underneath can cooperate with to begin the experience, however you can shoot any helper, Complete Catharsis or get excessively near them, to begin the experience.
- At the point when the experience begins, the two individuals on the stage will find a Wizard showing up from the entryway. Rout the Wizard, and afterward a Blightguard Knight will show up. Rout the Knight, and it will drop a Brand sphere. One individual from the gathering on the stage assigned as a sprinter should bring the sphere down the corridor to the individual remaining on the Totem. The one remaining on the stage will need to take out any foes they see getting through the huge way to help those remaining on the Totem.
- The individual remaining on the Totem will have an emanation safeguarding them known as the Brand of the Weaver. While remaining on the Totem and killing foes, this player will get heaps of Deathsinger’s Power, and the Brand of the Weaver buff will count down. The individual who took the Brand sphere from the upper stage and has gotten down to the Totem can take that buff from the other individual, and they will believe should do this before the buff uses up all available time. The Brand of the Weave goes on for 30 seconds.
- At the point when they trade buffs, the individual remaining there and acquiring Deathsinger’s Power should get back to the focal point of the field. They will deliver their stacks there, controlling up the entryway. These stacks will get some margin to drop off, so plan to remain here for some time. In the wake of delivering those stacks, they can return up to the stage, get the Brand sphere from the Blightguard Knight, and afterward get down to the Totem. Everybody will need to proceed with this cycle to finish the experience.
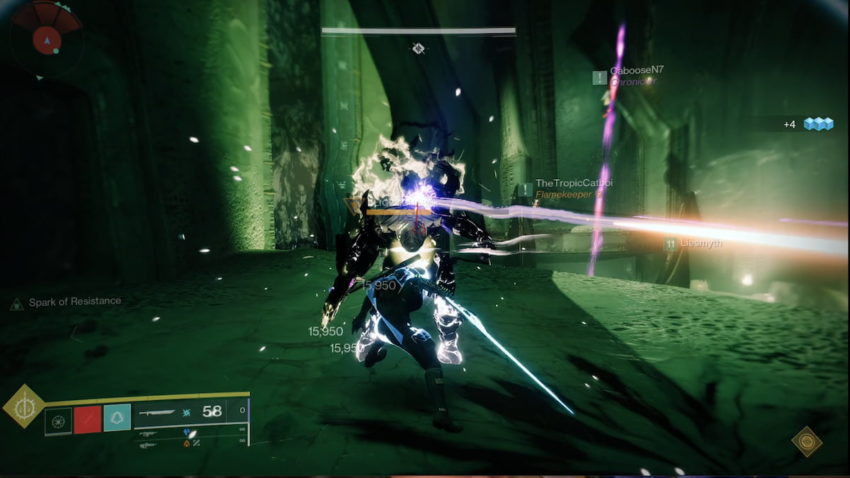
- Generally on the third or fourth run, an Unstoppable Ogre will show up in the middle field. Those taking out the Wizards and Blightguards will need Solstice Armor Glow to utilize relentless weapons to daze and overcome this enemy.
- You should keep on going through this turning system until your group has gathered 100 Deathsinger’s Power and remained on the Power the Glyph and Complete the Totems encounter in Kings Fall Raid in Destiny 2 center Totem to charge the entryway. You can watch the advancement by noticing the gleaming glyphs on the entryway, and when they arrive at the top, the experience has been finished.
- We suggest that those remaining on the stages have a Sword or a Machine Gun against the Knight to rapidly take them out so the sprinters can easily get the Brands and rush down to the Totem. The Wizard that shows up at the entryway will likewise have a safeguard over it, and in the event that you can utilize a weapon that can match its safeguard, you can dispatch it a lot quicker.
- Try not to be shocked in the event that somebody who begins at the top stages needs to trade with a sprinter and hurry to the base to Steal the Brand. You will need to speak with your group in regards to the number of piles of Deathsinger’s Power you that have, as this implies you need to remain on the middle Totem longer to drive the entryway.

How would I do strikes in Destiny 2?
- At present there are three strikes in the game, every which requires a particular development. Foresaken DLC for the Last Wish attack, Shadowkeep DLC for Garden of Salvation and Beyond Light DLC for Deep Stone Crypt.
- Strikes are 6 man exercises, significance you’ll require a preformed fireteam to endeavor one. You can either koinna group to find partners Power the Glyph and Complete the Totems encounter in Kings Fall Raid in Destiny 2 or simply go on the Find Fireteam segment of the Destiny friend application or Bungie.net
- Strikes have complex mechanics which expect you to be on sound talk with colleagues consistently. You will likewise have to have a proper power level to have the option to battle adversaries.
What is the fastest method for killing Oryx in the Kings Fall attack?
To start with, take every one of the yields other than Wheat (sick get to that later) then track down houses worth checking (smithy/twofold entryway houses) Power the Glyph and Complete the Totems encounter in Kings Fall Raid in Destiny 2 those normally have then chests. You would then take all the haybales which will provide you with a lot of wheat and bread for a really long time. You would then pile up 3-4 blocks and kill the iron golem for iron. That is the speediest way as I would like to think.