

Sub Badges on Twitch Customization is one of the main reasons why many creators use Twitch. It carries a degree of relatability to a channel that watchers find fun and engaging. Learning how to add a sub badge on Twitch is one of the many things you ought to be aware to assist your channel with transcending the rest. Read on to find out exactly what sub badges are and how to add them on Twitch!
Subscribers are watchers that decide to pursue a paid enrollment on your channel. They pay a monthly charge as a trade-off for increased recognition and honors in chat.
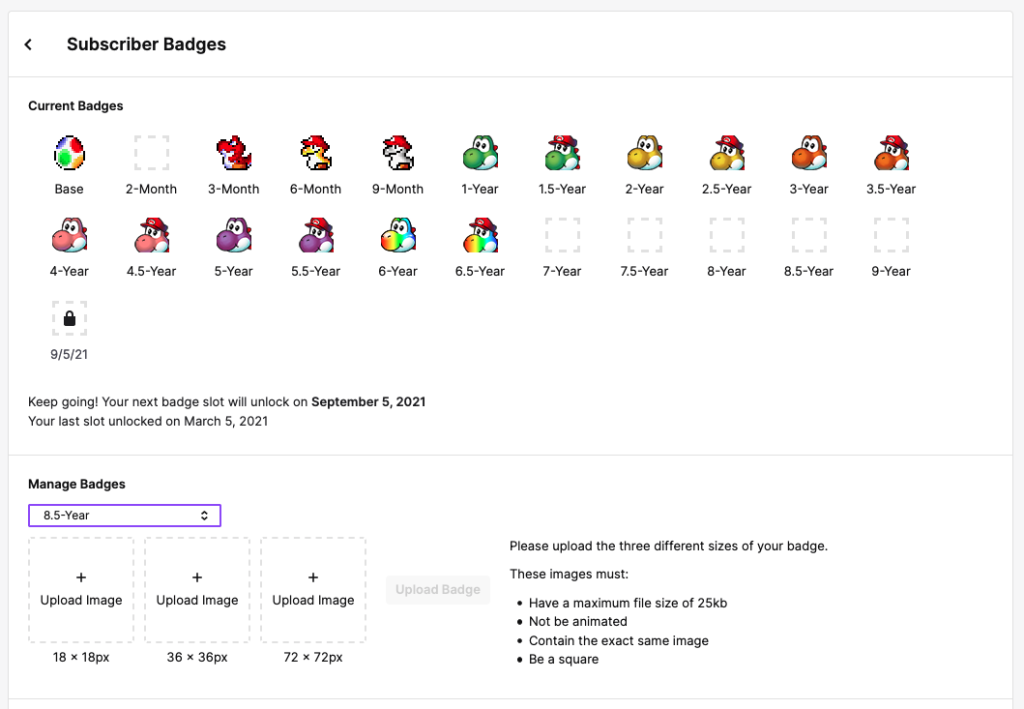
At the point when a subscriber joins, they automatically get a sub badge. This badge is a small icon close to their name in chat.
Sub badges change automatically the longer the watcher stays a subscriber. They usually get more beautiful and extravagant the longer the watcher has been subscribed. This assists them with standing out more in chat and elevates their status above standard watchers.
With the assistance of sub badges, Twitch streamers can easily recognize subscribers in a clamoring chat. These convincing icons automatically appear close to usernames while sprucing up the appearance of a channel.
Make a Twitch Sub Badge
To make and upload custom sub badges, you have to be a partner or an affiliate. I’ll cover the criteria for each option, then, at that point, you conclude which one is ideal! Affiliate qualification expects you to have eight hours of streaming, seven special broadcasts, and three concurrent watchers in the last 30 days. You’ll also require at least 50 adherents. Half a month after gathering these criteria, you’ll get a notification to apply.
Find a Picture for your Badge
Find a picture you’d be pleased to see alongside a subscriber’s name. Airbnb Has Banned Twitch Streamer I suggest going with something that addresses your channel and isn’t too detailed since sub badges are small. According to Twitch’s rules, you can’t utilize images of single letters except if it addresses the brand. The following are a couple of examples from popular streamers.
To create another badge for each milestone, find numerous pictures to test. Your images should have a transparent background, so utilize an image with an item in the middle. This will make eliminating the background easier in the following stage.
Upload Picture to Kapwing
Head over to Kapwing in your program, click “start editing” and drag and drop a picture into the Studio. You can also paste an image URL or snap upload. For first time clients, Kapwing is a free program based video editor you can use on any gadget. To eliminate the background, click “erase” and utilize the magic wand to choose and erase the background from your image. You can utilize the brush tool to get those hard to reach areas.
Resize Background
Twitch sub badges come in three sizes, 18px x 18px, 36px x 36 px, and 72px x 72px. You should create a badge for each size. At the point when you’re done making a badge in the main size, you can resize the background to create the remaining versions. For this example, I’m creating my most memorable badge to be 18px x 18px. Click “custom” under yield size, type each number, and snap “done” to change the width and level.
Edit Sub Badge
You can edit your sub badge to take the plan up a score with Kapwing’s free tools. Click “adjust” and move the circle from left to right to change the brilliance, saturation, contrast and more or snap “channels” to give your badge an alternate vibe.
Export and Download
After adding any final touches to the badge, click export image at the top of the Studio. Once your image has been handled, click “download” to save it to your gadget. In the event that you see a watermark, you can sign in with Google or Facebook to eliminate it free of charge, then, at that point, click “download.” You can click make a duplicate to create a duplicate version to resize, download, and save.
Tag us on Instagram or Twitter to show us your new sub badges and look at the related articles underneath for more Twitch content. Subscribe to our YouTube channel for in vogue TikTok tutorials and watch our Kapwing tutorials for content creation tips.

How do I get an emote on Twitch?
Twitch Acts out are usually created by partners or streamers with colossal followings. Elden Ring Player Hilariously Fails To Outsmart Radagon Boss Fight They basically create their own act out and submit it in to Twitches health and safety counsel. They then wait for approval to check whether it’s been accepted or not.
Basically its TLDR is. Except if you’re a someone, it’s incredibly rare to have your Act out be accepted on Twitch.
Turn into a major name and it then becomes easier, yet and still, at the end of the day, a ton of large name streamers have difficult issues with their own acts out getting accepted too. Twitch intentionally attempts to keep the acts out not excessively convoluted.
What are BITS and gifted subs on twitch?
Two of the most popular ways for watchers to show support for your channel are through Subscriptions and Bits. We should take a glance at what they are and how you can best utilize them.
Subscriptions let your local area support you on a consistent basis and get rewarded with select advantages for doing as such. Aside from the great energies, subscribers gain access to custom global acts out usable across all of Twitch, subscriber badges, without ad review, and more.
Bits are a virtual decent that your watchers can use to cheer in chat to show support, celebrate minutes, and amplify their voice. At the point when a watcher Cheers, animated Piece Pearl acts out, Cheermotes (animated versions of popular acts out), or custom Cheermotes (for Partners) appear in Chat. You get $0.01 for each piece utilized in your chat.