

In this article you will read about Seeed reTerminal Review. As Seeds is by all accounts on a run at this moment. We as of late reviewed Seeed’s double gigabit ethernet transporter board and viewed it to be a convenient piece of unit. In any case, for Seeed’s next transporter board we see an alternate bearing, an across the board gadget that incorporates the Compute Module 4 into a versatile frame, intended for modern and implanted applications.
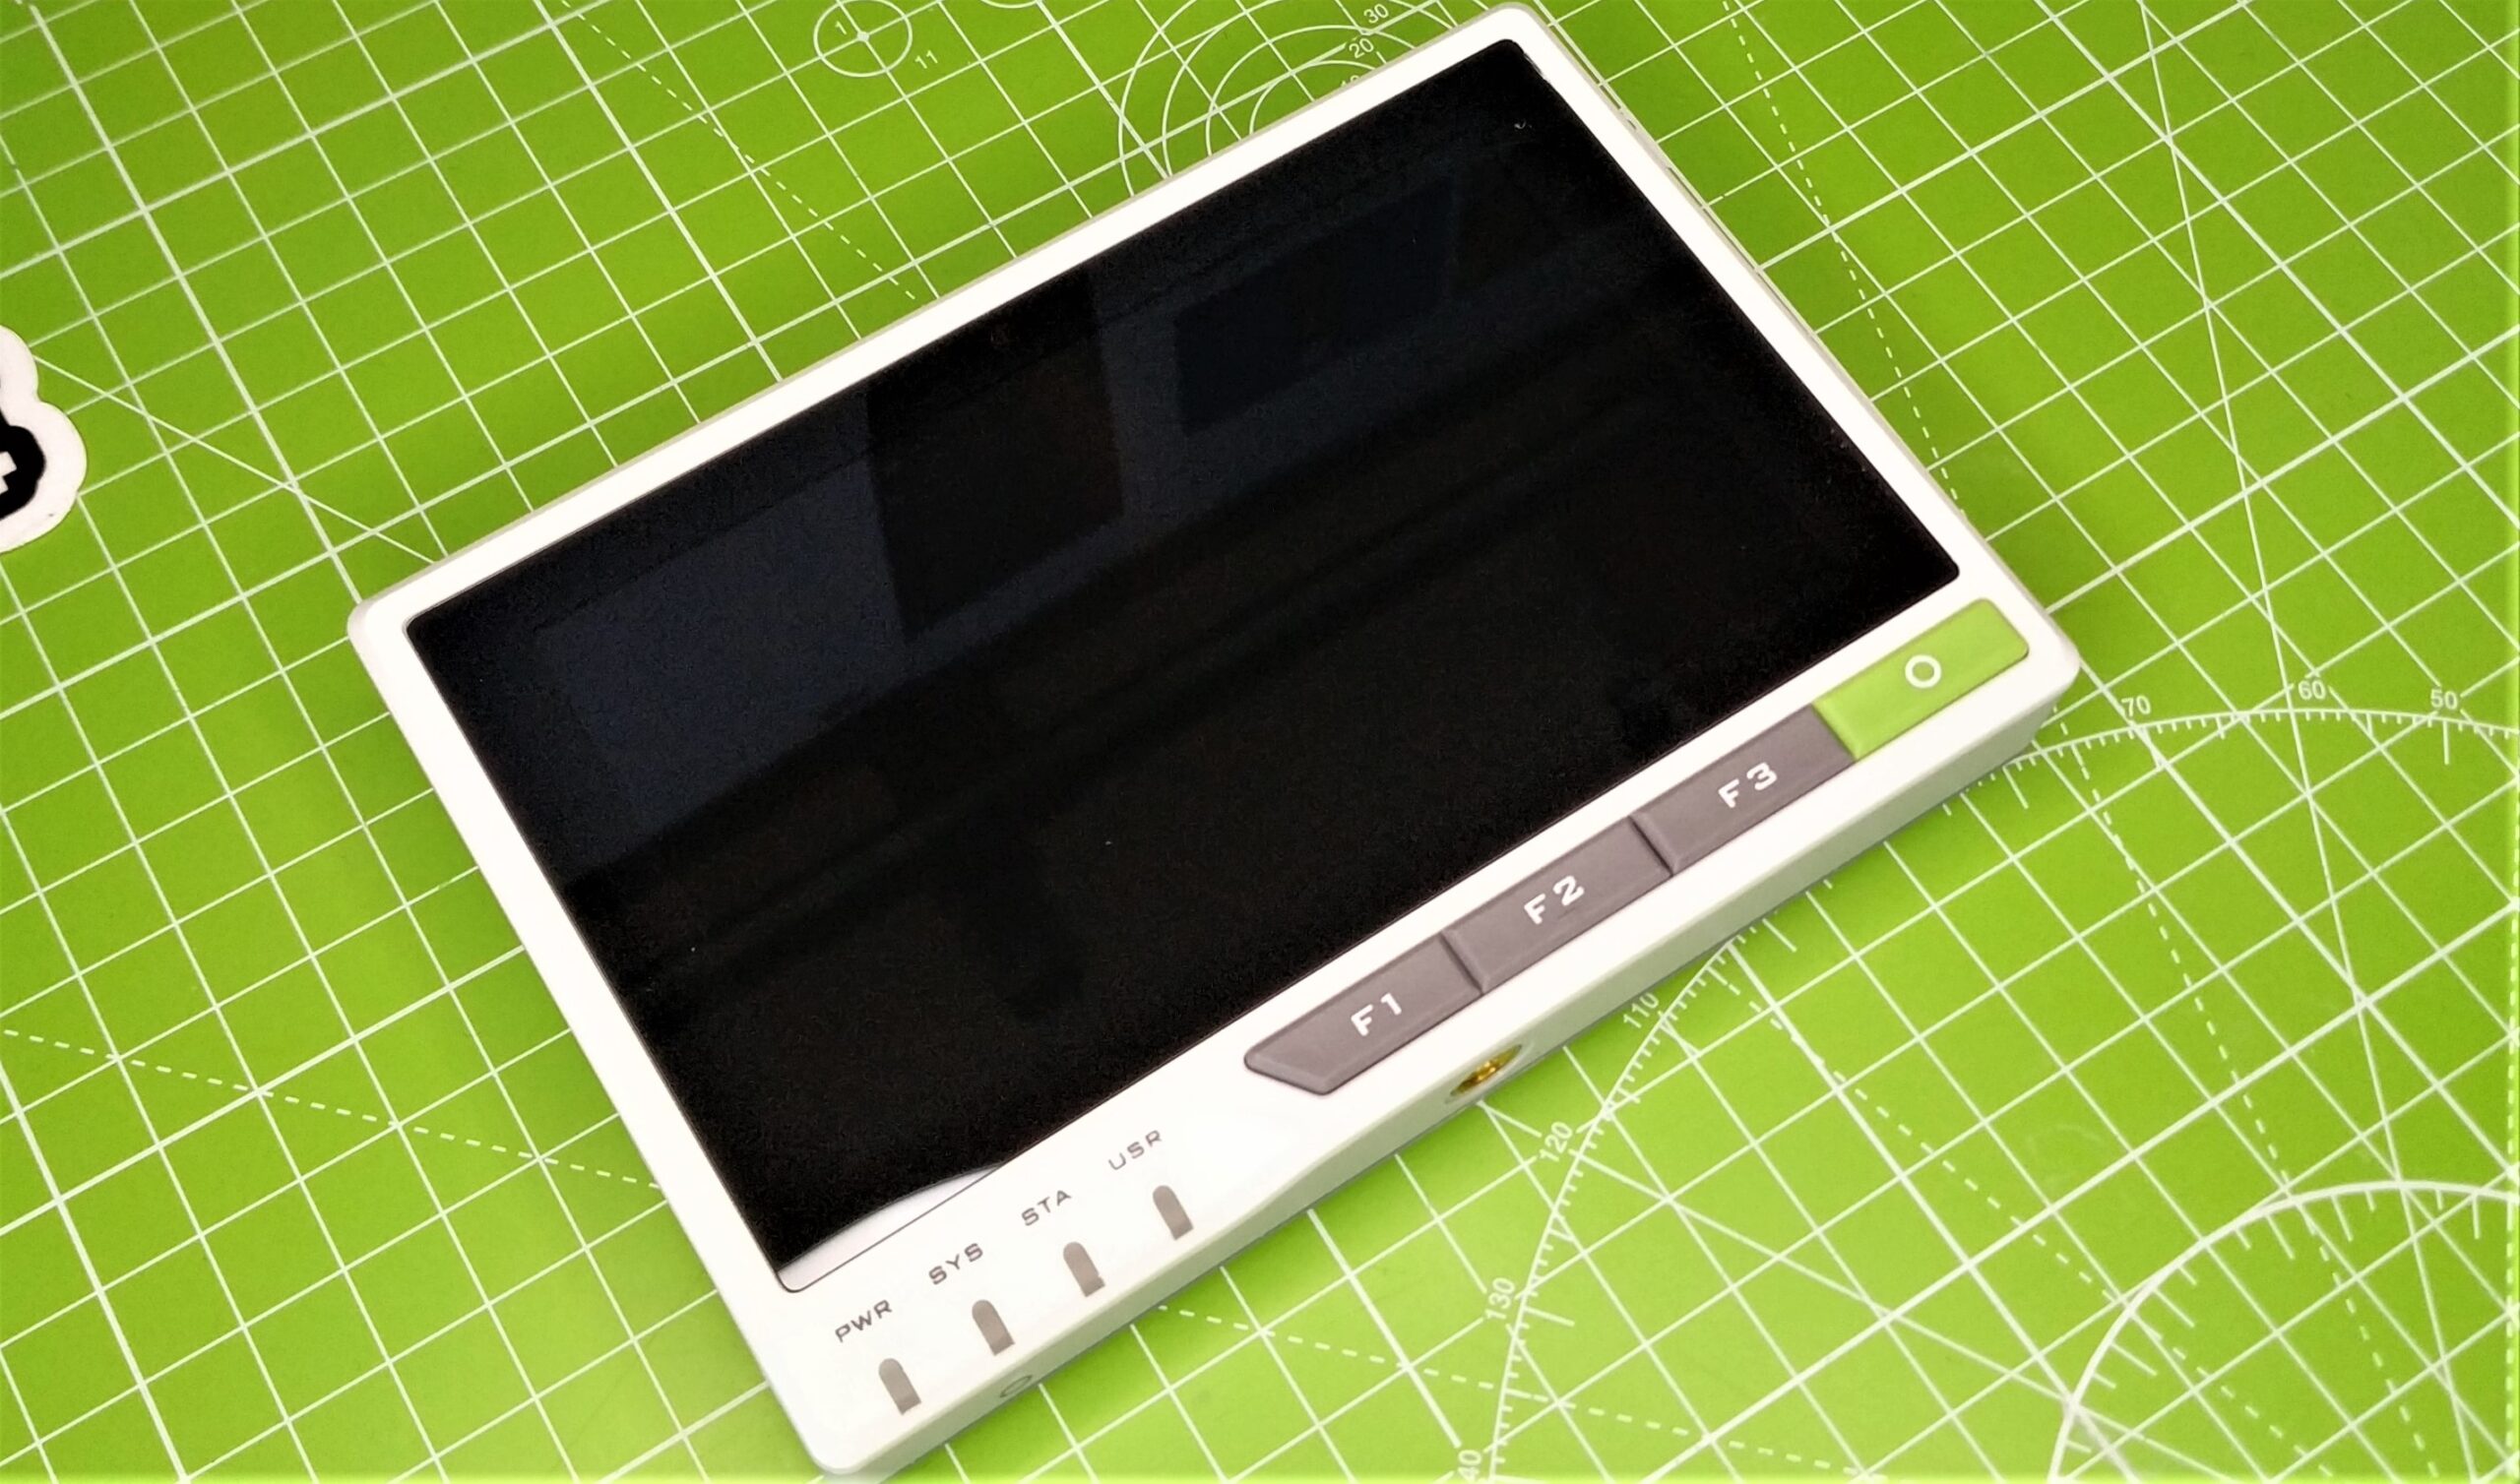
Seeed’s reTerminal tackles a Raspberry Pi Compute Module 4 with 4GB of RAM and a 32GB eMMC inside a plastic lodging overwhelmed by a 5 inch capacitive touchscreen. Regardless of the structure factor we actually approach the GPIO and two camera connectors, however there are a few issues that we will address throughout the review.
At $195, reTerminal is a venture as opposed to a drive buy, however how would we be able to manage it and for what reason would we spend that much on what is actually a Raspberry Pi 4?
Using the Seeed reTerminal
How about we start with the obvious issue at hand. Seeed’s reTerminal feels like a somewhat thick tablet, yet it does not have a battery. Sure we can add a USB battery through the USB C port, however there is no space inside reTerminal to add an inner battery.
The most ideal approach to utilize reTerminal is at your work area, or inserted into a venture with a solid force source. With Raspberry Pi OS pre-introduced onto the 32GB eMMC, we are prepared to construct projects with little grating, power up and go.
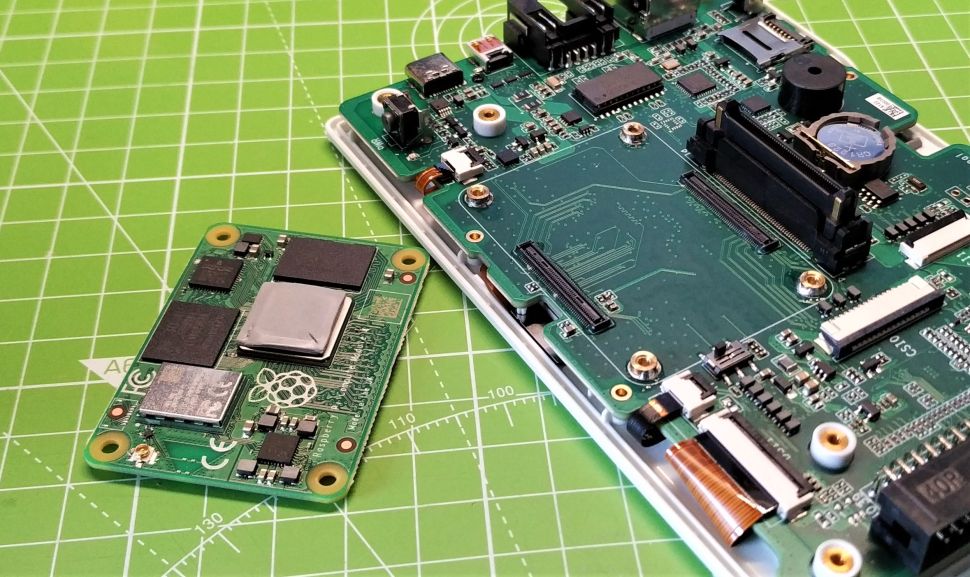
The look and feel of Raspberry Pi OS on the reTerminal is indistinguishable to the experience of a 4GB Raspberry Pi 4. The gave Compute Module 4 can be effectively traded out for another variation; we should simply eliminate the many screws holding the case together, then, at that point eliminate the four screws which secure the Compute Module 4 to the transporter board.
The 5-inch, 1280 x 720 screen is clear and splendid, in any event, for old eyes like our own. It upholds multi-contact input and is shockingly precise, empowering us to handily open and close windows and explore menus in lieu of a mouse. All things considered, a remote mouse and console are an extraordinary expansion to this gadget. Under the screen are four catches, F1, F2, F3 and a green “input/enter” button.
These catches are planned to a,s,d,f keys on the console which implies that can be effortlessly utilized in your code based activities. In case you were considering utilizing reTerminal a media player, well you would be advised to put resources into a Bluetooth speaker, as the just installed speaker is a basic ringer.

Getting inside reTerminal is simple, however it tends to be an overwhelming encounter. First we need to eliminate the four residue covers at the sides of the unit’s underside.
Then, at that point delicately pry the light dim plastic easing off, accept care close to the middle as it will flex and feel exceptionally delicate. Then, at that point eliminate the heatsink lastly eliminate within plastic case, taking consideration not to torque the Wi-Fi radio wire off.
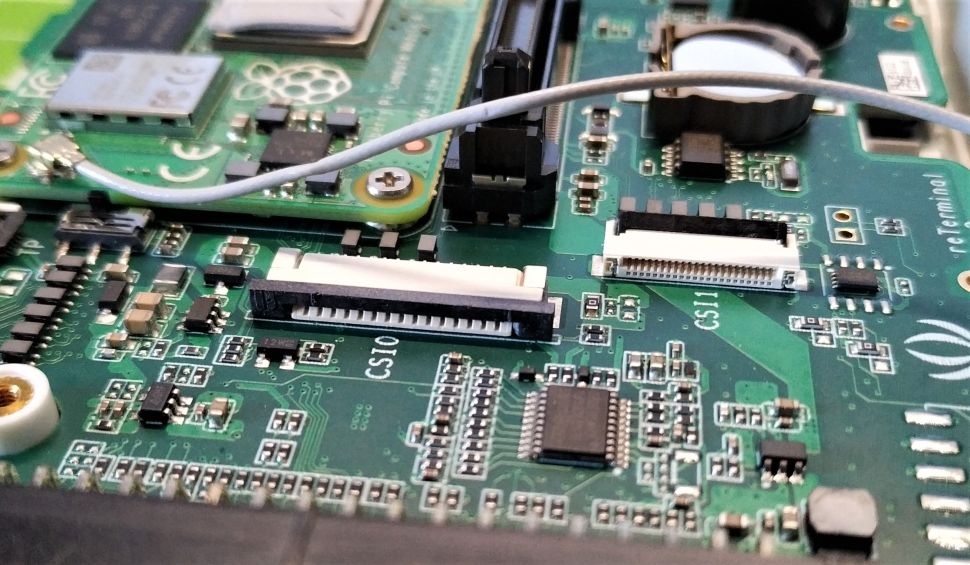
Once inside, we can see the recognizable connectors of the camera (CSI0) and a more modest Raspberry Pi Zero driven camera connector (CSI1). Interfacing a camera is moderately simple however deal with the dark plastic locks, and ensure that the gold pins of the camera’s flex link are pointing upwards and not down to the board.
We embedded the camera link erroneously, even in the wake of genuinely looking at the association, and it caused a short that saw the unit draw 1.4A of force and rapidly heat up.
The camera’s flex link will likewise should be strung through a space in the external case and this leaves the camera fluttering around in the breeze. A camera mount/holder would’ve been an incredible expansion.
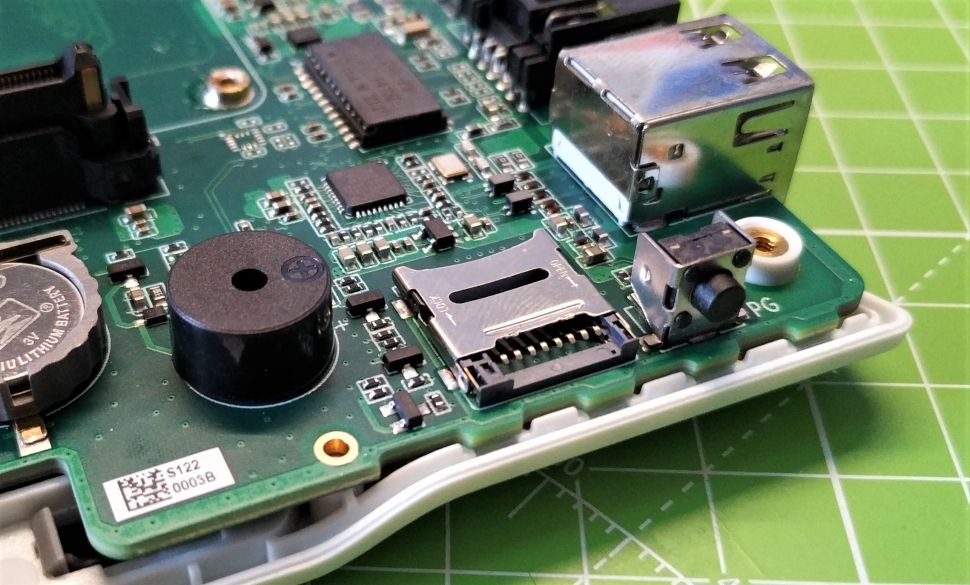
The microSD card space (see best microSD cards for Raspberry Pi) is something of an issue in that we can just access it by eliminating the case. In a modern setting, we get it, hiding ports lessens the danger of spontaneous code being run, yet the USB ports are an obvious objective for those sorts of assaults.
It would’ve been extraordinary to have the microSD card available through the outside of the case, however for the present we can regard it as an extra stockpiling alternative instead of a boot gadget.
On the sides of the reTerminal are four M4 screw focuses, intended for use with modules that give additional usefulness to model LoRaWAN, Industrial IO and PoE. We didn’t have any assistants to test so we can’t give any additional data yet the possibility of safely associating an extra is engaging.
Also Read: SteelSeries Arctis Prime Review
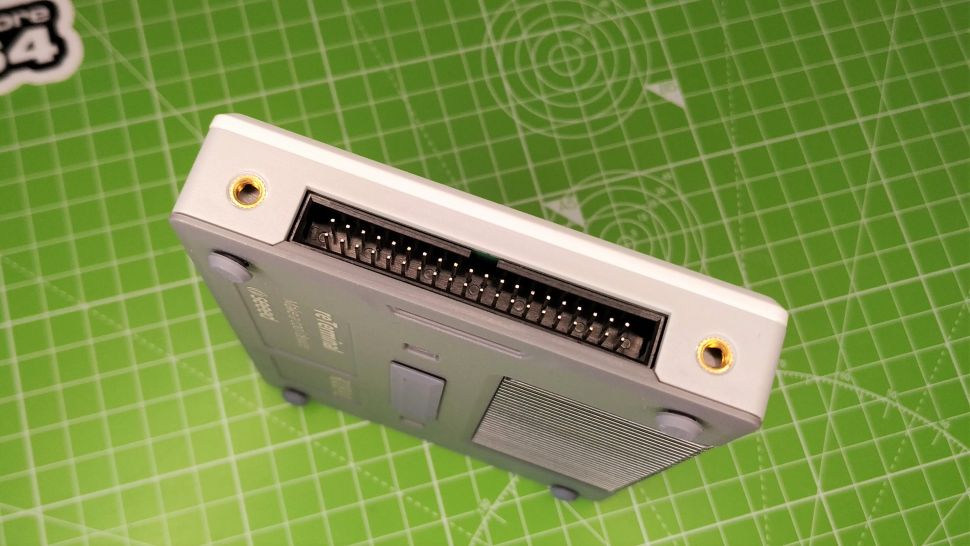
The single camera mount on the lower part of reTerminal is a valuable way to mount reTerminal to a stand or section, keeping the unit in simple reach, however far removed. On the underside we have an enormous modern connector, what breaks out a PCI-e 1 path have, USB 2.0, 26 GPIOs and PoE. Tragically we don’t have anything to interface it to so we couldn’t test.
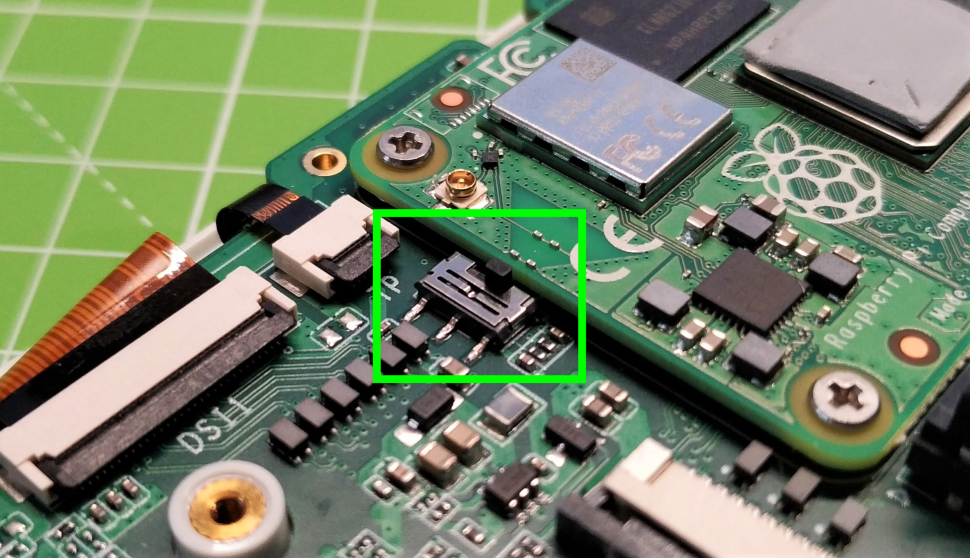
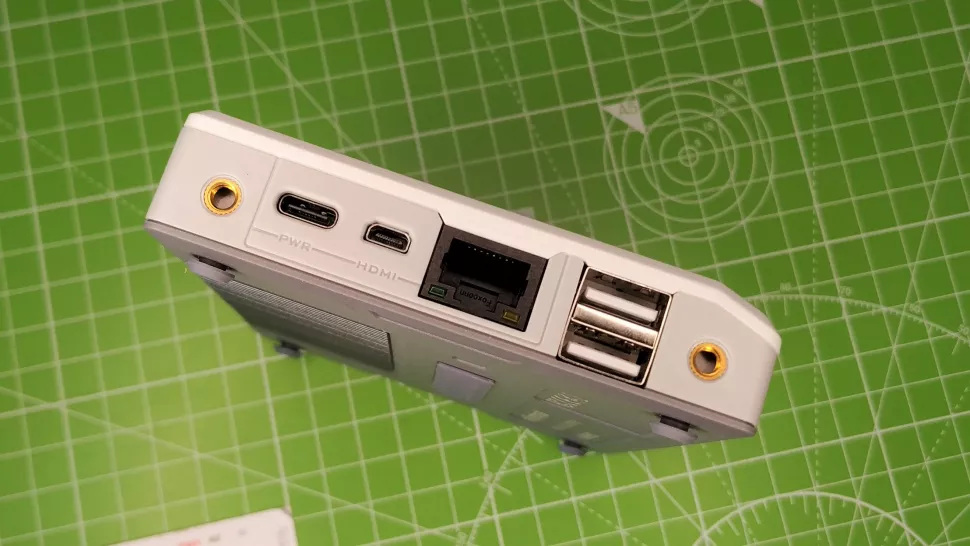
Blazing an OS onto the eMMC of the Compute Module 4 is somewhat trickier than a microSD card. Seeed’s reTerminal accompanies the most recent Raspberry Pi OS introduced to the 32GB eMMC, however should we wish to utilize another OS, or clean up an old introduce, we first need to flick a switch close to the Compute Module 4, empowering it for USB blazing.
Interface the reTerminal to a Windows machine through the USB C port. We then, at that point need to follow the authority documentation to empower our Windows machine to see the reTerminal and afterward we can streak an OS utilizing the authority Raspberry Pi Imager.
Utilizing the GPIO requires an outside breakout board, like Pimoroni’s HAT Hacker HAT. We associated a breakout and afterward utilized a Pimoroni Explorer HAT Pro and a Sense HAT. Both worked without any issues. The GPIO is as available and simple to use for what it’s worth on an ordinary Raspberry Pi.
Specifications of Seeed reTerminal
| Raspberry Pi Compute Module 4 | Broadcom BCM2711 quad-core Cortex-A72 (ARM v8) 1.5 GHz | |
| 4GB RAM | ||
| 32GB eMMC | ||
| Wi-Fi / Bluetooth 5.0 | ||
| Micro SD card reader | ||
| Display | 5-inch 1280 x 720 LCD Capacitive touch panel with multi-touch support. | |
| Built-in Modules / Sensors | NXP Semiconductors PCF8563T Real Time Clock STMicroelectronics LIS3DHTR | |
| Accelerometer | ||
| Microchip ATECC608A Hardware Based Key Storage | ||
| Levelek LTR-303ALS-01 Light Sensor | ||
| Microchip MCP23008-E IO Expansion | ||
| Connections | Full 40 pin GPIO | |
| 2x USB 2.0 | ||
| Micro HDMI | ||
| USB C | ||
| Gigabit Ethernet | ||
| Camera mount | ||
| Dimensions | 5.5 x 3.7 x 0.8 inches (140 x 95 x 21 mm) |
Use Cases for the Seeed reTerminal
The structure factor and camera mount connection imply that reTerminal is bound for use in fascinating spots. In a modern setting, reTerminal will be at its best. Ready to work with off the rack sensors and segments used to screen mechanical cycles, in addition to we have the force of a Raspberry Pi 4, consolidated into a little bundle.
For home clients, this is the place where the line obscures a bit. At $195, including the Compute Module 4, Seeed’s reTerminal is for stalwart Pi clients and those hoping to scratch a tingle for their installed projects. Sure reTerminal can be installed into a robot, and the five inch touchscreen gives an optimal interface to control and view the situation with your creation.
Conclusion
$195 is a ton of money to spend on a Raspberry Pi Compute Module 4 item. Seeed’s reTerminal is an organized, strong and responsive piece of pack. The structure factor is amazing and the 5-inch touchscreen show is barely enough for most tasks.
The setbacks for reTerminal are the restricted admittance to the camera ports and the microSD card and the absence of a battery. Yet, in the event that you can work round these impediments, maybe you have the best Pi for your next project.