

Utilize the means in this record to assist with supplanting a hard drive in your PC. To add a hard drive with greater limit (update), realize that you can remove hard drive from hp pavilion 17 laptop measured hard drive that meets the association type in your PC. Most frequently this is sequential ATA (SATA or eSATA). Additionally realize that there are organizing limits that might be experienced for drives bigger than 2 TB. To get to every one of the information on drives bigger than 2 TB design the drive utilizing GPT or make various allotments less than 2 TB.
Its got a 1GB cross breed SSHD-which truly isn’t everything except a 5400rpm. While searching the assistance articles I notice that HP truly doesn’t need you to open up their laptops. There are simply diverts to pages diverting you to different pages.
Assuming your laptop is overheating during activity and pointedly switching off, this most probable is overheating of the cooling framework. The justification behind this is the aggregation of residue on the radiator. Assuming not spotless the cooling framework sooner rather than later, it might make harm the laptop. You can remove hard drive from hp pavilion 17 laptop this issue by rehashing the methodology shown in the video underneath.
Before you start
- You really want a Phillips head screwdriver.
- Switch off the PC. Separate the Ethernet or modem link. Separate the power string.
- Move the PC to an unmistakable, level, stable work surface over a non-covered floor.
- HP emphatically suggests the utilization of an enemy of static wrist lash and a conductive froth cushion when chipping away at the PC.
- Try not to remove a part from its defensive bundling until you are prepared to introduce it.
How to Remove Hard Drive From HP Pavilion 17 Laptop
To remove the hard drive from your HP laptop. You can also read about Turn on HP Laptop Without Power Button from here. There are 4 steps which are given below:
- Take Out the Battery
- Remove Base/Service Door
- Extract CD Drive and Remove Face Plate
- Take Out Hard Drive
Take Out the Battery
It is critical to take the battery out prior to continuing. Since you want to deplete the laptop of charge to forestall an electric shock. To do this, start by flipping around your laptop. There will be a dark board on one side of the laptop. This is the place where the battery is found.
Prior to eliminating the battery, you should initially open it in the event that you have a more seasoned model. There is a switch with a lock symbol under the battery. Ensure that it is pushed to one side. This will uncover an opened latch picture under the switch.
Which implies that your battery is currently opened. Presently you should simply slide the switch on the opposite side to one side. This will set the battery free from its compartment.
Remove Base/Service Door
This progression contrasts dependent on what model you have. Assuming you have a more established model, you would have to take out every one of the screws from the base. Utilize a Philips screwdriver for this assignment. There will be 20 screws altogether. However, two of them will be covered by a sticker.
So you should remove these stickers prior to getting to work. Later this, remove the corner covers to track down four additional screws When you remove them, the base should come right off.
With fresher models, you wouldn’t have to remove the whole base. All things being equal, you can simply remove the help entryway. Which is a Z-formed board in the focal point of the back base. Unscrew the screws that are holding the help entryway set up.
Then, at that point, utilize the very switch that you used to deliver the battery. This will push the help entryway out. Furthermore you can get to the parts that are under.
Extract CD Drive and Remove Face Plate
In the event that you utilize a more seasoned model, you would have to take the CD drive out. Those that have a more up to date model with an assistance entryway should jump to Step 4. Push down on the button that you use to launch the drive. Pull the CD drive while holding the button down. Then, you should remove the faceplate.
Which is the plastic cover on the facade of your laptop. All in all, it’s the place where the console is. Since the screws are removed, eliminating the faceplate ought to be simple. You want something that can slide between the scores. Be delicate on the grounds that you can scratch and scrape the faceplate if you don’t watch out. You really want a slim, level item for this. A little level headed screwdriver can function admirably.
Slip it between the scores and delicately apply up pressure. The faceplate should begin jumping out. Be careful about over the top strain, as this could make the faceplate break. Pop the faceplate out from all sides and afterward burrow your nails under it to haul it out. You will currently see every one of the interior parts of your laptop.
Take Out Hard Drive
We will initially discuss eliminating a hard drive from a more current model. The hard circle will have two screws holding it set up. Take these out first. Ensure you don’t discard them. They could prove to be useful when you are placing your new hard drive in. In any case, you would require them to reinstall your underlying hard drive assuming that is the thing that you like.
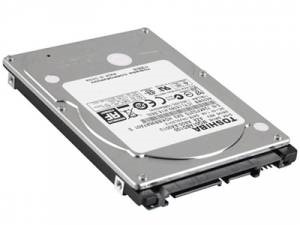
Then, slide the hard drive away from the connector terminal. Disengage it from the dark texture covered link. The hard drive’s connector should remain set up. Presently you should pull the tab on the hard drive transporter and remove the hard drive from its apparatus. To remove it from the transporter, take out the screws.