

Assuming you own or Make Rules to Your Discord Server, I’m certain that you need to keep your local area fun while protecting it. You don’t believe individuals should come in and badger different individuals on channels and DMs.
Considering that, you can set up rules for new individuals on the application. Whenever you empower Membership Screening on your server, new individuals need to consent to your principles before they can send messages or respond to posts on channels and discussions inside your server.
By setting decides and adding arbitrators that can authorize them, discord rules bot that you can forestall or limit spamming, tormenting, and badgering from occurring inside your server.
How to Make Rules to Your Discord Server
To have the option to add rules to your Discord server, you should initially empower the local area choice on the server. Following the enactment of the local area work, you will actually want to arrange the server rules.
Assuming that you’ve approved your email address and your server agrees with the media content channel standard, the local area capacity will be made accessible to you. The usefulness improves the authoritative capacities of your server. This contains elements, for example, a welcome screen, server experiences, participation screening, and different elements too. You’ll have the option to add server rules to the enrollment screening instrument after it’s introduced. Before anyone can turn into an individual from your server, they should initially peruse and consent to the guidelines that have been laid out.
The accompanying advances will tell you the best way to add rules to your Discord server:
- Empower people group
- Set up server rules
- Empower your progressions
1. Empower people group
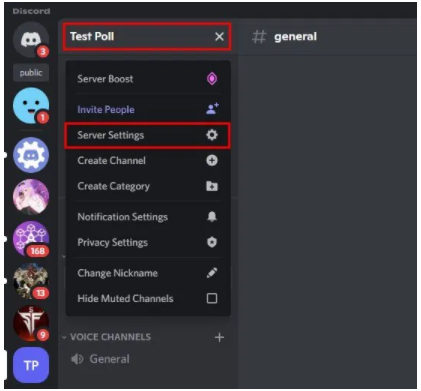
- The initial step is to ensure that your server has the local area usefulness empowered. To start, Unlock Wasp Halo Infinite send off Discord on your PC’s work area and sign into your current record. Then, go to your Discord server and sign in. From that point onward, click on the name of your Discord server. After you’ve tapped on the name of your Discord server, a route cabinet will show up on your screen. There are an assortment of settings accessible in the route cabinet. Remembered for this class are “Server Boost,” “Welcome People,” “Server Settings,” and others. To get to your server settings, select “Server Settings” starting from the drop menu.
- Following your choice of “Server Settings,” you will be shipped off the “Server Overview” page. You’ll track down an assortment of options in the left-hand sidebar. This covers areas, for example, “Outline,” “Jobs,” “Emoticon,” and others. Make a choice under the “Local area” header and afterward click on “Empower Community.”
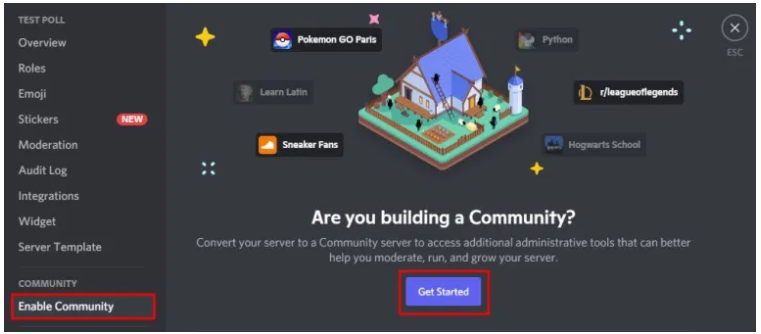
- What’s more, the local area highlight gives regulatory devices to your server, for example, the capacity to design server rules. Basically click on “Get everything rolling” to start the method involved with arranging the local area highlight on your server.
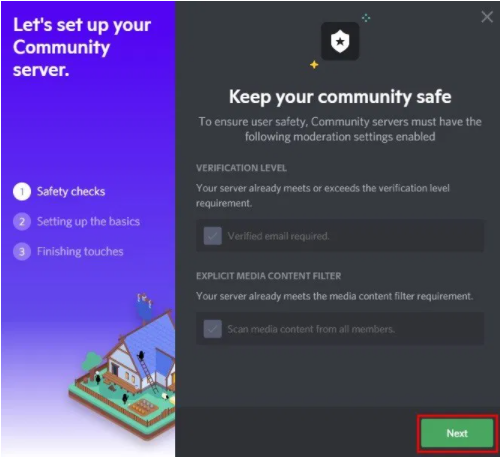
- It will be important for you to set up your local area server after you have tapped on “Get everything rolling.” The initial phase in designing your local area server is to perform security tests. You should have a substantial email address to utilize the local area work.
- Likewise, your server should match the prerequisites for the media content sifting framework. If it’s not too much trouble, check your email address on the off chance that you have not previously done as such by going to your record settings and tapping on “Check.” Afterwards, actually look at your letter drop and affirm your email address by tapping on the “Confirm Email” button.
- To progress to the following stage, ensure that you’ve recently approved your email address and that your server fulfills the media content channel rules by tapping on “Next.”
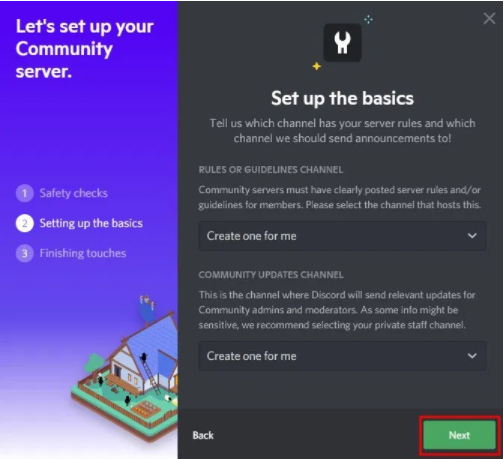
- The subsequent stage is to get the basics set up. As a local area server, you should have a channel for rules and rules, as well as a channel for local area refreshes. Pick “Make another channel for me” in the event that you don’t as of now have both of these channels set up. The choice to “Make one for myself” ought to be chosen of course for this situation. If, then again, you as of now have those channels, you might pick them from the dropdown box. To go to the last stage, select “Next” starting from the drop menu.
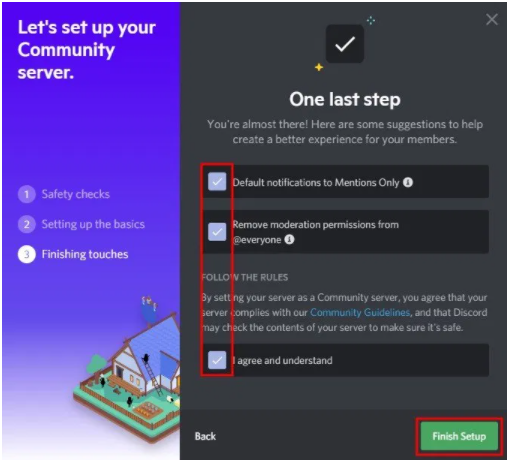
- After you’ve chosen “Next,” you’ll be shipped off the “Final details” part of the interaction. To set up your local area server, you should finish the accompanying advances:
- Three checkboxes will be accessible to you at this stage. This contains choices, for example, “Set notices to be sent uniquely to Mentions,” “Eliminate directing freedoms from @everyone,” and “I concur and fathom.”
- To complete the arrangement, you want to actually look at all of the checkboxes. This is to make a superior encounter for your individuals. Finally, click on “Finish Setup” to complete the arrangement.
2. Set up server rules
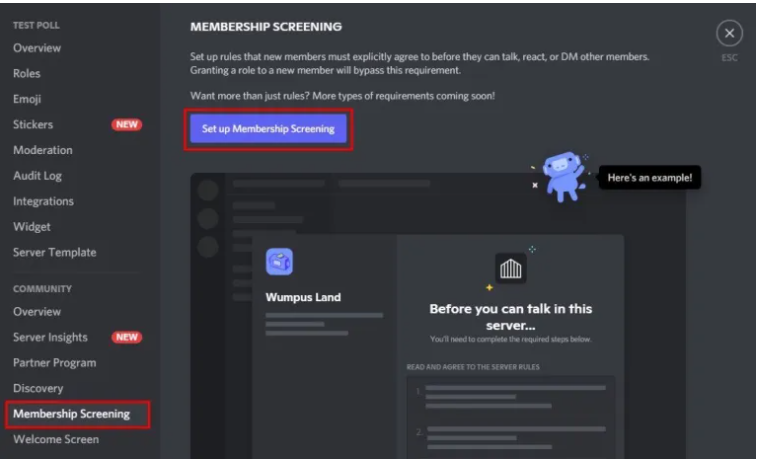
- Having actuated the local area work, you’ll have the option to redo your server by adding rules to it. To start, select “Participation Screening” starting from the drop menu on the left sidebar. The Membership Screening apparatus will be sent off because of this activity.
- New individuals should consent to your server guidelines before they can join your server, and you might utilize the Membership Screening instrument to get this going. To set up Membership Screening, select “Set up Membership Screening” starting from the drop menu.
- Following your determination of “Set up Membership Screening,” you will be given the “Server Rules” choice. You might utilize this element to characterize server rules and need forthcoming clients to consent to them before they can start visiting. To start adding server rules, click on the “Begin” button.
- Following your determination of “Begin,” the “Server Rules” page will be shown. Fill in the spaces on the page with the principles that you wish to carry out on your Discord server. To add another standard, select “Add a standard” starting from the drop menu. On the other hand, you might use the example rules simply by tapping on them. Whenever you’ve wrapped up adding the principles, click on the “Save” button to keep them set up.
3. Empower your progressions
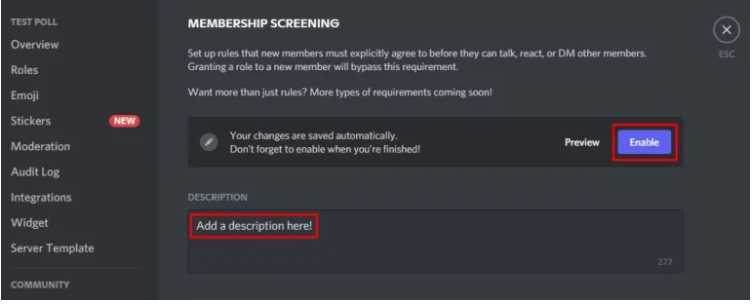
- Your standards will be put away when you have tapped on the “Save” button. Notwithstanding, they have not yet been actuated. You should initially give a depiction of your server for them to be empowered. Without giving a definite depiction of your server, you can not permit your changes.
- Depict what’s genuinely going on with your server in the “Portrayal” part of the structure. Whenever new clients join your server, they will actually want to get to this data. You’ll have the option to empower your adjustments when you’ve finished the method involved with adding a portrayal to your server. To roll out your improvements viable, click on “Empower.” You’ve finished the method involved with adding rules to your Discord server!
How would I make a guidelines direct in Discord?
Well most importantly, it’s an ordinary text channel that you can make and call anything you like.
To transform it into a “rules” channel with the unique symbol, you want to empower your server as a Community Server.
You can transform your server into a Community Server by going into your Server Settings:
- Under Community, select “Empower Community”
- Begin and follow the means and prerequisites.
- When you have your Community Server ready to go to the Overview tab under Community in your Server Settings.
- Under the header “Rules or Guideline Channel” you can choose a current text channel to turn into your “Rules” channel.
What are the standards of the Quora Discord server, Quorum?
- Be all around as tense as humanly conceivable.
- Be irritating
- Be a rebel
- Carry on like you’ve taken heroin and a caffeinated drink, then went on the web
- Holler “Screw MY ASS” and other such expressions over and over